Are you looking to give your garage door a fresh, appealing look? Painting your garage door can be a cost-effective way to enhance its appearance and protect it from the elements. However, one common issue that many people face is the paint sticking or peeling, which can ruin the overall finish. In this comprehensive guide, we will walk you through the step-by-step process of how to paint garage door without sticking.

Key Takeaways:
- Proper preparation is crucial for a successful paint job.
- Choose high-quality exterior paint for durability and weather resistance.
- Follow the right painting techniques and allow proper drying time.
- Lubricate moving parts and perform regular maintenance to prevent sticking.
5 Easy Process of How to Paint Garage Door Without Sticking
Here are 5 easy processes of how to paint garage door without sticking:
Process 1: Understanding the Importance of Proper Garage Door Painting
Before we dive into the painting process, let’s discuss why it’s crucial to paint your garage door correctly. Your garage door is an extension of your home and plays a significant role in its overall curb appeal. A well-painted garage door can significantly enhance the visual appeal of your property and increase its value. On the other hand, a poorly painted door can detract from the overall aesthetic and even lead to functional issues such as sticking and peeling. Therefore, it’s important to understand the importance of proper garage door painting before you begin the process.
Process 2: Preparation is Key
To ensure a successful painting project, proper preparation is essential. Follow these steps to prepare your garage door for painting:
Step 1: Clean the Surface
Start by thoroughly cleaning the surface of the garage door. Remove any dirt, grime, or grease using a mild detergent and water solution. You may also need to use a scraper or wire brush to remove any loose or peeling paint. Once the surface is clean and smooth, rinse it with water and allow it to dry completely.
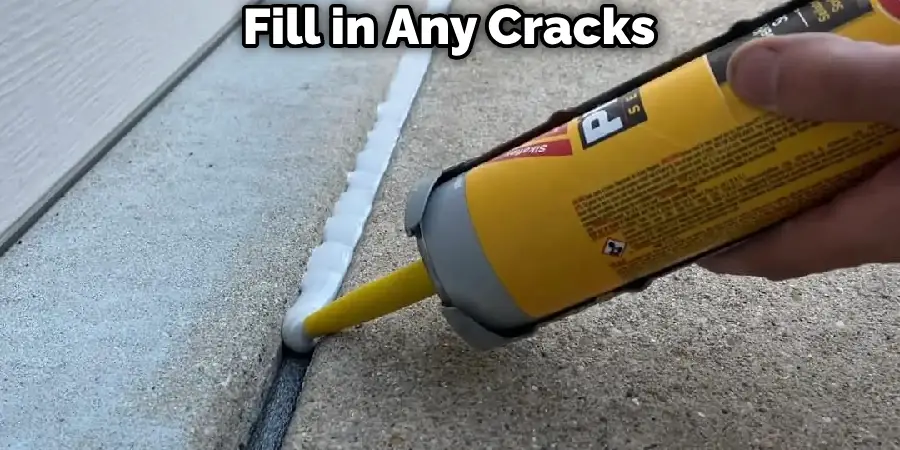
Step 2: Repair Any Damage
Inspect the garage door for any damage or imperfections. Fill in any cracks, dents, or holes using a suitable filler. Sand the repaired areas to ensure a smooth surface.
Step 3: Protect Surrounding Areas
Cover the surrounding areas with drop cloths or plastic sheets to protect them from paint splatters. Use painter’s tape to mask off any sections you don’t want to paint, such as windows or hardware.
Step 4: Prime the Surface
Applying a primer is crucial for ensuring proper paint adhesion and a smooth finish. Choose a high-quality exterior primer that is suitable for the material of your garage door. Apply the primer according to the manufacturer’s instructions and allow it to dry completely before moving on to the next step.
Process 3: Choosing the Right Paint
Now that your garage door is properly prepared, it’s time to choose the right paint. Consider the following factors when selecting paint for your garage door:
Step 1: Exterior Paint
Opt for a high-quality exterior paint that is specifically formulated for outdoor use. Look for paints that offer durability, weather resistance, and UV protection. These features will ensure that your garage door remains vibrant and protected for years to come.
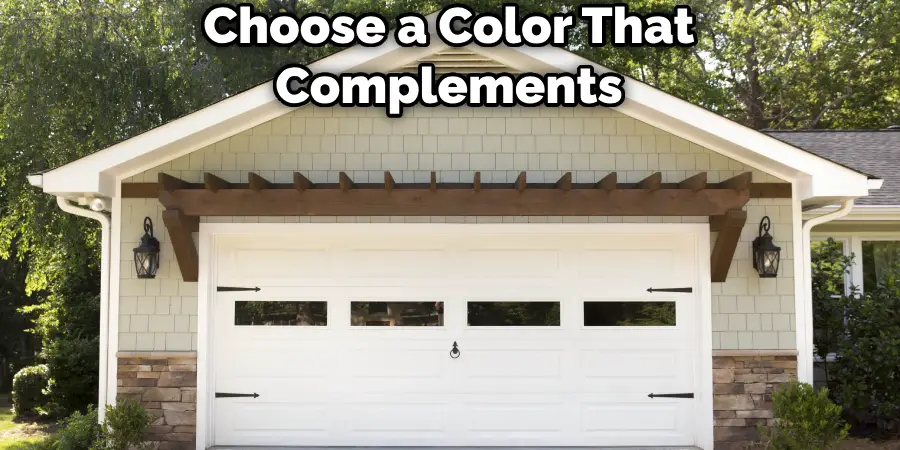
Step 2: Color Selection
Choose a color that complements the overall aesthetic of your home. Consider the architectural style, existing color scheme, and personal preferences. It’s generally recommended to stick to neutral or classic colors that will stand the test of time and appeal to a wide range of potential buyers if you plan to sell your home in the future.
Step 3: Finish Options
Select a finish that suits your desired look and provides the necessary durability. Satin, semi-gloss, or gloss finishes are commonly used for garage doors as they offer better resistance against dirt, moisture, and fading. Consult with a paint professional or refer to the manufacturer’s recommendations for the best finish option for your specific garage door material.
Process 4: Painting Techniques
Now that you have the right paint and your garage door is properly prepared, it’s time to start painting. Follow these techniques to achieve a smooth and professional-looking finish:
Step 1: Gather the Necessary Tools
Before you begin painting, gather all the necessary tools and materials. This may include paintbrushes, rollers, paint trays, drop cloths, and stir sticks. Make sure you have everything you need within reach to avoid interruptions during the painting process.
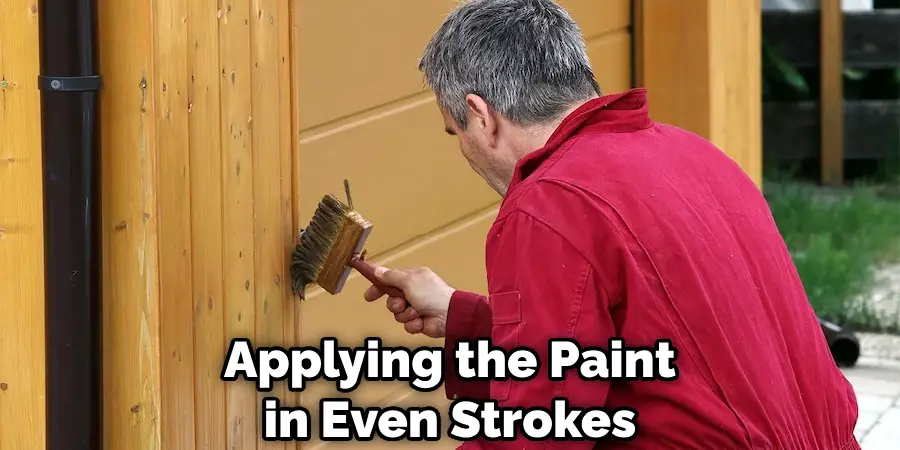
Step 2: Start with the Edges
Begin by painting the edges of the garage door using a brush. Pay attention to corners and crevices, ensuring even coverage. This will provide a clean and defined outline for the rest of the painting process.
Step 3: Paint the Panels
Next, move on to painting the larger sections of the garage door. Use a roller or sprayer for faster and more efficient coverage. Work in small sections, applying the paint in even strokes. Be mindful of maintaining a wet edge to avoid lap marks.
Step 4: Allow for Proper Drying Time
After applying the first coat of paint, follow the manufacturer’s instructions for drying time. It’s essential to allow each coat to dry completely before applying additional coats. This will ensure proper adhesion and a smooth finish.
Step 5: Apply Additional Coats
Depending on the desired color intensity and the coverage achieved with the first coat, you may need to apply additional coats. Follow the same painting techniques and drying times between coats. It’s better to apply multiple thin coats rather than one thick coat to prevent dripping and achieve a more even finish.
Process 5: Preventing Sticking Issues
One common problem that many people encounter after painting their garage door is sticking. The paint can adhere to itself, causing the door to become difficult to open and close. To prevent sticking issues, follow these tips:
Step 1: Proper Drying Time
Allow the paint to dry thoroughly between coats and before closing the garage door. Rushing the drying process can lead to sticking or smudging. Follow the recommended drying times provided by the paint manufacturer.
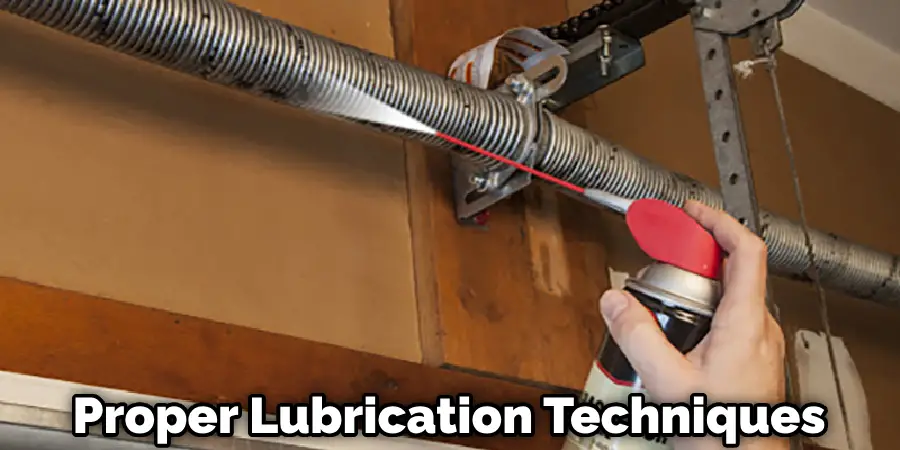
Step 2: Lubricate Moving Parts
Apply a thin layer of lubricant, such as silicone spray or WD-40, to the moving parts of the garage door after the paint has fully cured. This will prevent sticking and help the door operate smoothly. Be sure to follow the manufacturer’s instructions for proper lubrication techniques.
Step 3: Regular Maintenance
Perform regular maintenance on your garage door, including cleaning and lubrication, to keep it in optimal condition. This will help prolong the life of the paint and prevent sticking issues in the future. Consult your garage door’s manufacturer or a professional for specific maintenance recommendations.
You Can Check It Out to Paint Garage Doors to Look Like Wood.
FAQs About How to Paint Garage Door Without Sticking
What is the Best Way to Paint a Garage Door?
The best way to paint a garage door depends on the material it is made of. For vinyl doors, use a vinyl-safe paint and clean the surface before painting. For wooden doors, sand the surface and apply a primer before painting. For metal doors, use acrylic or direct-to-metal exterior paint, and prime any areas of rust. The preferred method for painting a garage door is using urethane paint through spraying. It is recommended to start painting the edges of the trim where it meets the wall and continue until all edges of the trim are complete. To paint a garage door, you will need safety glasses, a paint roller, drop cloth, painter’s tape, and other materials. Before starting, make sure to check the weather and prep the surface by cleaning and sanding or scraping off any loose paint.
What Not to Do When Painting a Garage Door?
Painting a garage door requires careful preparation and attention to detail. Firstly, ensure that you thoroughly clean the door and sand it to create a smooth surface. Use the appropriate type of paint and apply it in long, slow strokes to avoid streaking. Allow each coat to dry completely before applying the next one. Don’t forget to prime the door and use painter’s tape to achieve clean lines. It’s crucial to plan around the weather and choose a suitable time for painting. Protect the surrounding areas with a drop cloth and take necessary safety precautions. By following these guidelines, you can achieve a professional-looking finish and prolong the life of the paint job on your garage door.
Should I Paint My Garage Door With a Roller or Brush?
When it comes to painting a garage door, both a roller and a brush can be used. The choice between the two depends on personal preference and the desired finish. Using a roller is a quicker and more efficient option, especially for larger surfaces. It allows for even coverage and can save time. A brush, on the other hand, gives you better control and precision, making it ideal for detailed areas and edges. To achieve the best results, a combination of both methods can be used. Start by using a brush for the edges and detailed areas, and then use a roller for the main sections of the door. This will help you achieve a smooth and even finish while ensuring all areas are properly covered.
Conclusion
Painting your garage door can be a rewarding and cost-effective way to enhance its appearance and protect it from the elements. By following the process outlined in this guide, you can achieve a professional-looking finish while avoiding common issues like paint sticking or peeling. Proper preparation, choosing the right paint, and utilizing the correct painting techniques are key to a successful garage door painting project. Remember to take your time, follow the manufacturer’s instructions, and enjoy the transformation of your garage door.