Your garage door is a workhorse, tirelessly opening and closing to grant you access to your sanctuary. But like any hard-working machine, it needs a little TLC to keep it humming along smoothly. That’s where lubrication comes in – a simple maintenance task that can make a world of difference in the performance and longevity of your garage door system.
Regular lubrication not only ensures whisper-quiet operation but also extends the lifespan of crucial components, prevents rust and corrosion, and even boosts energy efficiency by reducing the strain on your garage door opener. In short, it’s a small investment that pays big dividends in the form of a well-oiled, hassle-free garage door experience.
In this comprehensive guide, we’ll dive deep into how to lubricate your garage door, equipping you with the knowledge and techniques to keep your door gliding like a well-choreographed dance. So, let’s roll up our sleeves and get started!
Key Takeaways:
- Regular lubrication extends component lifespan, reduces noise, and increases energy efficiency.
- Use silicone or lithium-based lubricants, avoiding petroleum-based products.
- Lubricate hinges, rollers, springs, bearing plates, lock, armbar, and top rail every 6 months.
- Proper lubrication prevents costly repairs and ensures safe, hassle-free operation.
Understanding the Importance of Lubrication
At the heart of your garage door lies a symphony of moving parts – hinges, rollers, springs, and bearings – all working in harmony to facilitate smooth, effortless operation. However, the constant friction between these components can take its toll, leading to excessive noise, binding, and premature wear and tear.
Inadequate lubrication is often the culprit behind these issues, and neglecting this crucial maintenance task can have far-reaching consequences. From the annoyance of a squeaky, rattling door to the potential safety risks posed by a malfunctioning system, the importance of keeping your garage door well-lubricated cannot be overstated.
By reducing friction and wear, lubrication not only prolongs the lifespan of your garage door components but also ensures their optimal performance, resulting in a quieter, more energy-efficient operation. It’s a win-win situation that preserves both your investment and your peace of mind.
Preparing for Lubrication
Before embarking on the lubrication process, it’s crucial to gather the right supplies and prepare your workspace for a safe and efficient experience.
1. Supplies Needed
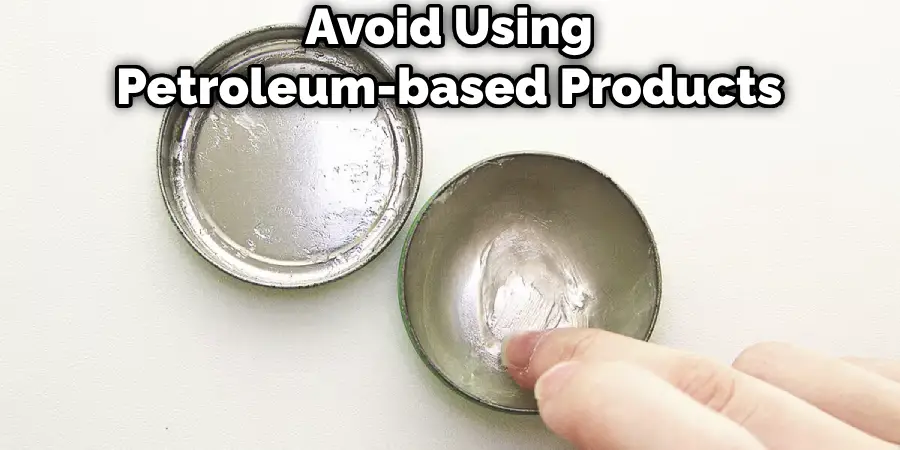
At the heart of your lubrication arsenal should be a high-quality, garage door-specific lubricant. Opt for silicone-based or lithium-based formulations, which are designed to withstand a wide range of temperatures and resist attracting dirt and debris.
Avoid using petroleum-based products like WD-40, as they can strip away existing lubrication and promote the buildup of grime, ultimately defeating the purpose of your efforts.
In addition to the lubricant, you’ll need:
- Clean rags for wiping away excess lubricant
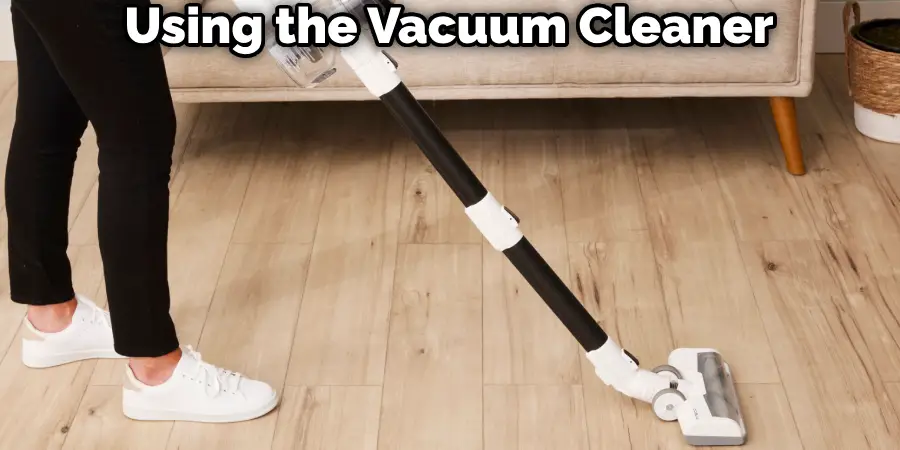
- A vacuum cleaner with a hose attachment for removing debris from hard-to-reach areas
- A sturdy stepladder to access the top components of your garage door
- Protective gear (gloves, eye protection, and a dust mask) for added safety
2. Workspace Preparation
Before you dive into the lubrication process, take a few moments to prepare your workspace:
- Close the garage door: This will provide easy access to all the moving parts you’ll be lubricating.
- Disconnect the power source: For your safety, disconnect the power source to your garage door opener, either by unplugging it or turning off the circuit breaker.
- Clear the area: Remove any clutter or obstructions from the area surrounding your garage door to ensure a safe and unobstructed workspace.
With your supplies gathered and your workspace ready, you’re now poised to embark on the lubrication journey, bringing your garage door back to its smooth, well-oiled glory.
6 Trustworthy Step-by-Step Process for How to Lubricate Your Garage Door
Here are six trustworthy step-by-step process for how to lubricate your garage door:
Step 1: Cleaning the Tracks
Before you start lubricating, it’s essential to ensure that your garage door tracks are free from dirt and debris. Any accumulated grime can impede the smooth movement of the rollers, causing them to stick or bind, and ultimately defeating the purpose of lubrication.
Start by using the vacuum cleaner with the hose attachment to remove any loose particles from the tracks. Then, wipe down the tracks with a damp cloth to remove any stubborn grime or buildup. If you encounter particularly stubborn messes, an automotive brake cleaner can be used to loosen and dissolve the grime, making it easier to wipe away.
Remember, it’s essential not to lubricate the tracks themselves, as this can attract more dirt and debris, creating a vicious cycle of grime buildup and impaired roller movement.
Step 2: Lubricating the Hinges
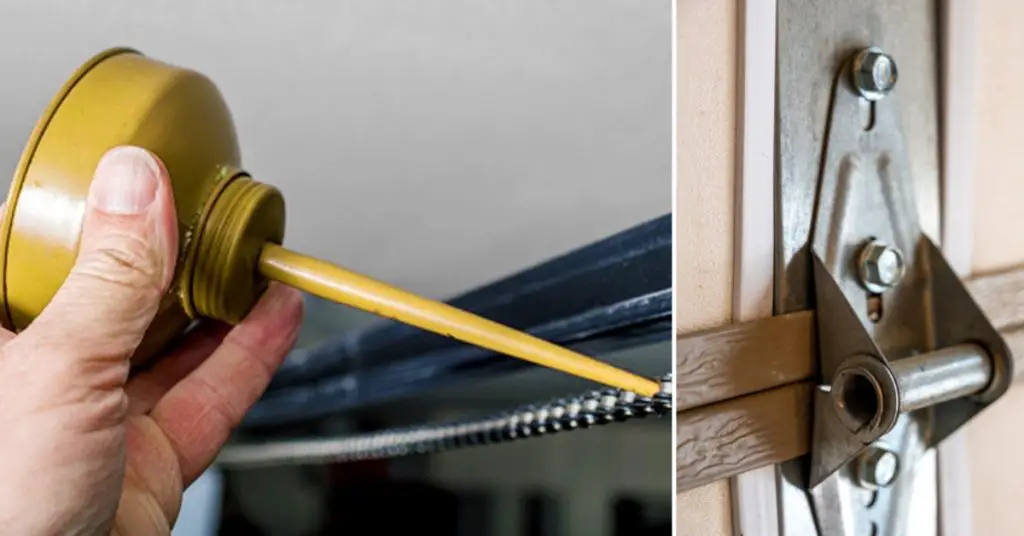
With the tracks cleaned, it’s time to turn your attention to the hinges that connect the individual panels of your garage door. Slowly open the door, exposing the hinges as you go, and apply a generous amount of lubricant to each hinge, focusing on the pivot points where the hinge bends.
This simple step will ensure smooth, quiet movement and reduce the wear and tear caused by metal-on-metal friction. Don’t be shy about applying a liberal amount of lubricant – these hardworking hinges deserve a little extra love.
Step 3: Lubricating the Rollers
Next up are the garage door rollers – those circular components that guide your door along the tracks. Depending on the type of rollers your door has, the lubrication process may vary slightly.
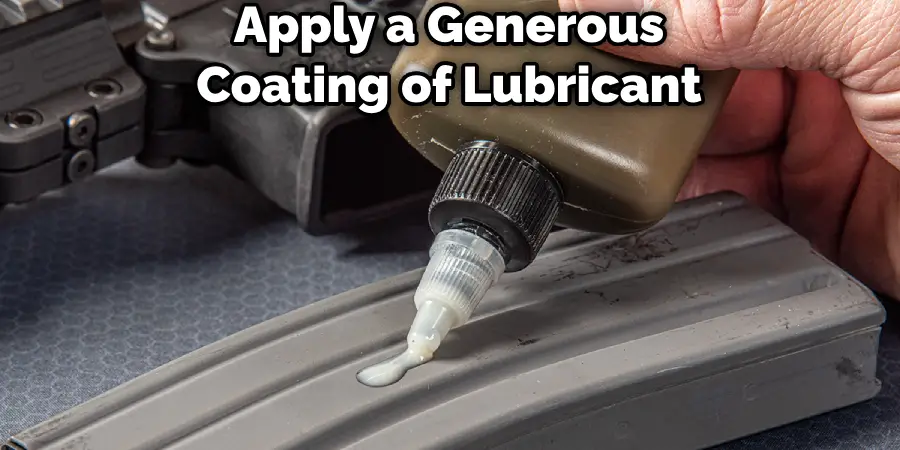
For metal rollers, use the straw attachment on your lubricant spray to access the inner ball bearings, and generously apply the lubricant. Be sure to wipe away any excess lubricant to prevent dripping or imbalance in your door’s operation.
If your door has nylon rollers, you’ll want to be a bit more judicious with the lubricant application. While you can apply a minimal amount to the bearings, avoid getting any lubricant on the nylon wheels themselves, as this can cause premature deterioration.
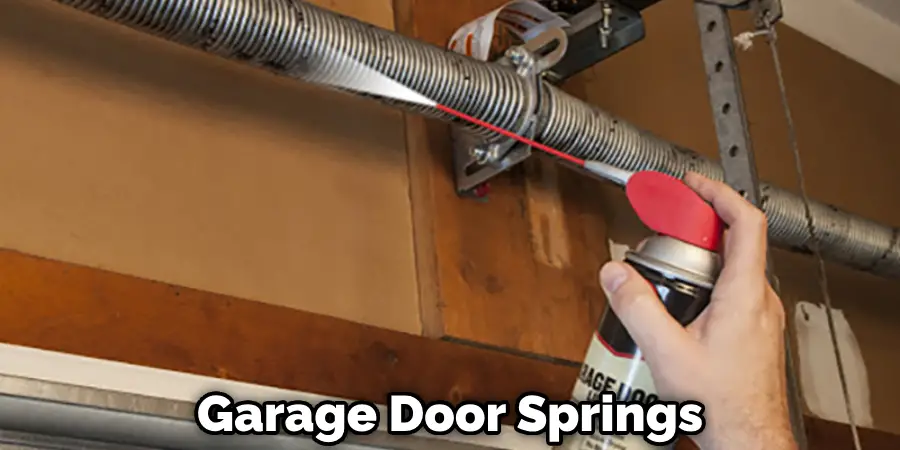
Step 4: Lubricating the Springs and Bearing Plates
Now, it’s time to grab that stepladder and tackle the top components of your garage door – the springs and bearing plates. These crucial components are often overlooked but play a vital role in the smooth operation of your door.
Carefully access the springs, taking all necessary safety precautions, and apply a generous coating of lubricant along their length. Don’t forget to lubricate the bearing plates located on either side of the springs, as these circular components facilitate the smooth movement of the spring system.
Once you’ve thoroughly lubricated these components, open and close your garage door a few times to evenly distribute the lubricant and ensure optimal coverage.
Step 5: Lubricating the Lock and Armbar
With the major components lubricated, it’s time to turn your attention to the lock and armbar – two often-overlooked elements that can significantly impact the overall performance of your garage door.
Locate the lock on your door and apply a small amount of lubricant to the keyhole. This simple step can prevent sticking and ensure smooth operation when locking and unlocking your door.
Next, find the armbar – the component that connects your garage door to the top rail – and apply a liberal coating of lubricant along its length. This will facilitate effortless movement and reduce the strain on your door’s operating system.
Step 6: Lubricating the Top Rail
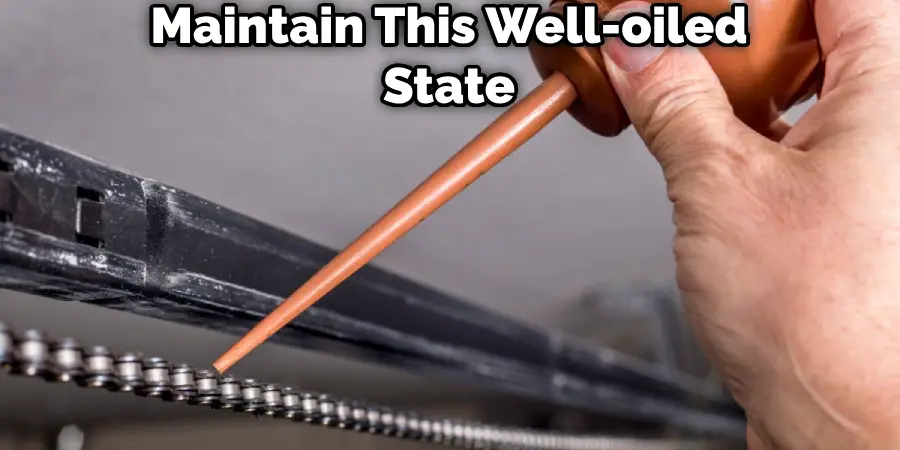
Finally, it’s time to tackle the top rail – the component that guides your door’s movement along the ceiling of your garage. Identify the top surface of the rail, where the chain or belt rides, and apply a generous amount of lubricant.
Use a clean rag to evenly distribute the lubricant along the length of the rail, ensuring smooth, unimpeded travel for your door’s operating mechanism.
Remember, while it’s crucial to lubricate the top rail, avoid applying any lubricant to the chain or belt itself, as these components typically come with their built-in lubricants, and additional lubrication can cause more harm than good.
You Can Check It Out to Reattach Garage Door Cable.
Maintaining Proper Lubrication
Now that you’ve meticulously lubricated every nook and cranny of your garage door system, it’s important to maintain this well-oiled state through regular maintenance.
As a general rule of thumb, aim to lubricate your garage door every six months, or more frequently if you live in a harsh environment or notice excessive noise or resistance during operation. By adhering to this routine, you’ll ensure that your door continues to operate smoothly and quietly, while also extending the lifespan of its components.
Keep an eye out for any signs that re-lubrication is needed, such as increased noise levels, jerky movements, or visible signs of wear and tear. Addressing these issues promptly by lubricating your door can prevent more serious problems from arising and save you from costly repairs or replacements down the line.
You Can Check It Out the Garage Door Spring Size Calculator.
Troubleshooting and Professional Assistance
Even with diligent lubrication, there may be instances where persistent issues or malfunctions arise. In these cases, it’s important to troubleshoot the problem and, if necessary, seek the assistance of a professional garage door technician.
If the noise or resistance persists after lubrication, take a closer look at the individual components. Worn-out rollers, damaged springs, or misaligned tracks could be the culprits behind the ongoing issues. In such cases, it may be necessary to replace the affected parts or have a professional technician perform a more thorough inspection and repair.
While lubrication is a relatively straightforward DIY task, certain repairs or replacements can be complex and even dangerous if not performed correctly. Garage door springs, for instance, are under immense tension and can cause serious injury if mishandled. In situations like these, it’s best to err on the side of caution and enlist the help of a trained professional.
Don’t hesitate to reach out to a reputable garage door service provider in your area. These experts have the knowledge, tools, and experience to diagnose and resolve even the most stubborn garage door issues, ensuring your system is operating at peak performance and safety.
FAQs About How to Lubricate Your Garage Door
What is the Best Way to Lubricate a Garage Door?
To properly lubricate a garage door, opt for silicone spray or white lithium grease, avoiding WD-40 or oil-based lubricants as these can attract dirt. Begin by cleaning the door and its parts, then apply lubricant to hinges (excluding plastic ones), metal roller bearings (but not on nylon rollers), torsion springs to prevent corrosion, and the armbar for smooth operation. Do not lubricate the tracks but ensure they are clean for the rollers to move smoothly. Regular maintenance, including lubrication every six months, is recommended for optimal performance and longevity of your garage door components.
Should I Use WD-40 on My Garage Door?
While WD-40 can be useful for lubricating, cleaning, and preventing rust on your garage door’s metal components, it’s not the best choice for all parts. Specifically, it should not be used on plastic or rubber components or for long-term lubrication of the door’s moving parts. Products like silicone-based or lithium-based greases are better suited for sustained lubrication needs, especially for chains in the garage door mechanism. Always refer to your garage door manufacturer’s manual for specific maintenance advice and apply any product sparingly to avoid damage.
What is the Best Lubricant for a Chain Drive Garage Door Opener?
For lubricating a chain drive garage door opener, the top recommendations often include motorcycle chain oil for its excellent penetration and protective qualities, white lithium grease for its durability and rust prevention, and silicone spray lubricants for their ease of application and ability to not attract dust. Each of these options provides effective lubrication to reduce wear and extend the life of the garage door opener, with motorcycle chain oil being particularly noted for its adaptability to variable temperatures and white lithium grease and silicone sprays offering long-lasting protection and maintenance benefits.
Conclusion
Maintaining a well-lubricated garage door is not just a matter of convenience – it’s an investment in the longevity, safety, and efficiency of one of the most hardworking components of your home. By following the steps outlined in this guide, you’ve taken a crucial step toward preserving the smooth operation and lifespan of your garage door system.
Remember, lubrication is an ongoing process, not a one-time fix. Make it a habit to regularly inspect and lubricate your garage door, and you’ll be rewarded with a quiet, hassle-free experience every time you open or close that mighty portal.
So, embrace the art of lubrication, and let your garage door glide effortlessly into action, day after day, year after year. After all, a well-oiled machine is a happy machine, and a happy machine is the foundation of a peaceful, well-functioning home.